Saturday, April 25, 2015

DIY Graduation Card

Tis the season to send grad gifts, and let's be honest...all most graduates want (and need) is cold, hard cash.


I don't love just inserting a bill into a Hallmark card and sending it along, and what kind of DIY'r would I be if I did? So when the grad invites came rolling in, I took to Pinterest to find a unique way to give a monetary graduation gift.

This card is a combination of this pin and this pin.

To make:

  • 1, two-sided piece of paper (or make your own like I did by glueing two together).
  • Vellum
  • Glue
  • Scissors
  • Printer
  • A cash bill of your choosing and a quarter. (This would be particularly meaningful if you used the graduation year currency)
  • washi tape
  • button
  • string (or buy already-made mini tassels at your local craft store, like I did)
  • A sticker (this is optional)


Directions:
1. Follow the instructions on this pin to make the actual card. I chose to have mine double sided, so that the inside of the card would look different than the outside.
2. I chose to place a grad-cap sticker on the front of the card enclosure to give it a nice finishing touch. This is optional. If you choose to use a sticker, adhere it with washi tape so that it comes free without damaging the card paper.
3. Because my paper was printed, it would be difficult to read if I printed directly on it, so I printed on a piece of vellum instead. I used the template from the card pin to decide the layout of my text, then just removed the template before printing. This helped a lot in determining font size and layout. The words read "Be who you are & Do what you"
4. Use this pin to create the origami money heart. Once done, use your washi tape to adhere it to the card. This way it won't tear or damage the card or the money when it's removed.

Voila! Easy, peasy!

-Cassie

See my pin here: https://www.pinterest.com/pin/178244097729407218/

Tuesday, April 21, 2015

Growing Up

It's been awhile since I did a family update, and I though I would share what we have been up to!

Since buying our new home at the beginning of March, we have been diligently working on unpacking boxes (there's still a good-sized pile in the garage, however), painting, and working on furniture and "redo" type projects. I'm in heaven, because there are so many fun things to work on, design, and do! I am also very pleased to say that the photography side business is going very well, and I am almost completely booked until July! It's such a great way for me to meet new people and get occasional adult interaction.

About two weeks after we moved in, Z and I took a trip to see my sister in Florida. She lives about 40 minutes outside of Orlando now (and about 25 from Cocoa Beach), so it was like a little mini-vacation for us. We went for a whole week, and I really loved catching up with my sister, as well as meeting my new nephew. It's a shame we live so far away now, but we talk frequently, and hopefully she'll be able to come visit soon.

And what's new with Z? While we were in Florida, Andrew changed Z's bed into a toddler bed, and made a toddler rail that looks great (it still needs to be painted). She had zero issues with it, and has done very well with it so far.

In addition to that, TMI here...BUT, week before last, I randomly put underwear on Zoe one day to see how she would do. Mind you, she hadn't really shown much interest in potty training prior to this. In fact, she had never even done her business in a toilet prior to her last day at daycare at the beginning of March, and since that, really hasn't had a repeat performance but once or twice. Nevertheless, the underwear apparently was what she was waiting for, because she is pretty much fully potty trained during the day (we will work on night training later). Woohoo for no more diapers!

On top of the potty training milestone, while we were on our trip back from Florida, Zoe chewed the tip off her binky (I let her have it on the plane for her ears). Even though I do have backup pacifiers, I told her that was the only one we had. Through the next week or so, Andrew and I laid the groundwork for the "Binky Fairy." We kept trimming small amounts from the tip of the binky, and explaining that the binky fairy would soon come and give her a gift in exchange for her binky. It worked after a week or so. She wasn't even really using the binky anymore because there wasn't much left. We convinced her to put the binky outside on the porch, and in the morning, a fairy costume was in it's place. We haven't heard anything about the pacifier since! I was so worried we would never get rid of that thing, so yay!


Monday, April 13, 2015

Concrete End Tables

With this house, we would like to make some of the furniture to be sure it is unique to our style. We sold quite a bit of the furniture in our previous home before we moved, because we knew we would want a different style, and most of it was very traditional. With this new house, we wanted to go for a urban farmhouse sort of vibe. A blend of ultra modern and vintage antiques. What better way to blend these together, than with a vintage sewing table base and concrete? I give you, our concrete end tables...


We actually made two of these. The bases are antique vintage sewing tables. The two I found didn't match exactly, but I actually prefer it that way. The bases can be found at many antique stores, particularly if you are looking for just the metal base without the wooden top.


To make the concrete top, you have to let go of any and all ocd. It just won't look perfect, but you'll learn to love the character. I could go on for days about what to do and what not to do. But most importantly, use the board (a laminate type board will work better because it doesn't absorb water) and the concrete mix pictured below, and make sure your concrete is super soupy. We made indentions with boards to match the sewing table base, so that the table top would sit down on the base without worrying about it tipping off. Once dry, we found sanding didn't really work to our advantage, so we made a slurry from the concrete mix and poured it over the top, smoothing it with a plastic putty knife. This helped smooth any pinholes. Once dry, we sealed it with a concrete sealer and waxed it with turtle wax for shiny protection!


Concrete Mix
Laminate Board


Monday, April 6, 2015

Our New Home

I have been seriously neglecting the blog thing for a few months. Its needed some TLC for awhile. Since Z is no longer a baby, a monthly update revolving around her is a little tedious (not that MY life doesn't revolve around her...it just probably isn't as appealing to the masses). SO with that being said, a revision seemed to be in order. Since my Kitchen makeover has gotten 20,000 hits and counting, it seems a blog revolving around our home projects is just the ticket. That's not to say I won't be posting the occasional family update, party planning adventures, and a sprinkle of photography-type posts and mommy topics, but I really hate to categorize (or set myself up for failure on account of not ever making time to actually blog about other stuff).

So why have I been MIA, you may ask? Well we purchased a new home at the beginning of March. We made an awesome profit on our home in Moore (the one with that popular kitchen re-do), and moved to a slightly larger place in Edmond. We love our new house, and we think it is very beautiful just the way it is. HOWEVER, we have this crazy NEED to do projects. Seriously, going to Lowes is what we do for fun. And Pinterest? Well let's just call that my dirty little secret. So now we have a whole long list of projects and ideas, and hopefully I will get to share most of them with you, along with some of our tips and tricks for all things home.

So let's get started...here is a few photo's of our new home. Consider these the "before" photos, and keep in mind they are listing pictures, so they have someone else's furniture and decor.

The Front. We don't plan to do a lot to it since it already has nice curb appeal.
The Office. This house has a ton of this orange/red color. A little bright for my taste, and since this is right off the front entrance, it will be one of the first rooms we complete (we have actually already painted it!), we will also be building a custom desk and shelving, along with changing the lighting.
The Dining. It's crazy large for a dining room. My table is dwarfed. We will paint, change the lighting, remove the carpet (although we haven't settled on a flooring option), and possibly add some sort of accent to one of the walls (like brick).
The Kitchen. We love the funky light fixtures and stainless appliances. The cabinets need to go back to white (rather than beige) and the red is going to go to a lighter, more neutral shade. We also plan to eventually build a custom, eat-in table.  In addition, we may change the backsplash and add an accent to one of the walls.
The Living. This picture is stretched (obviously), but it's still a nice-sized space. We plan to paint, change the tile on the fireplace, and remove the carpet. We may also change out some of the lighting. We will also be building some custom furniture for this space.
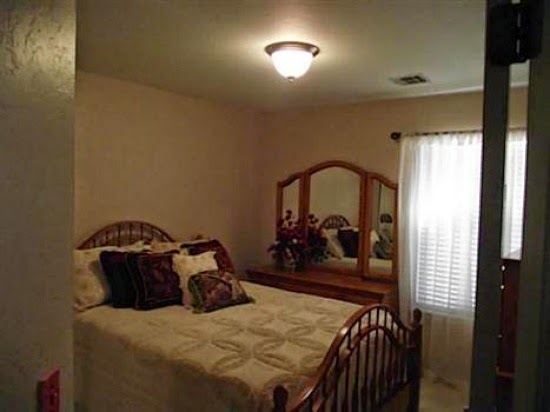
The Bedrooms. Paint and molding for the two smaller rooms, and new lighting for all.
The Back. This view sold the house for us. There are ducks and fish (fishing is allowed!!) However, a fence (which is actually already complete), is the first up on the project list in order to keep the little one from falling!